Saturday, March 24, 2012

Is Your Feed System Destroying Your Prints?

A few days ago I attempted a print at 0.1mm layer height for the first time. The first five or six layers went down really well. At that point things started to go wrong. The filament was only sparsely feeding. I wasn't getting solid lines of extrusion. It was more like dashed or dotted lines. I soon discovered that the fill pattern would change as I touched or moved the filament.


You can see where the infill started to go wrong.


The first few layers looked great.
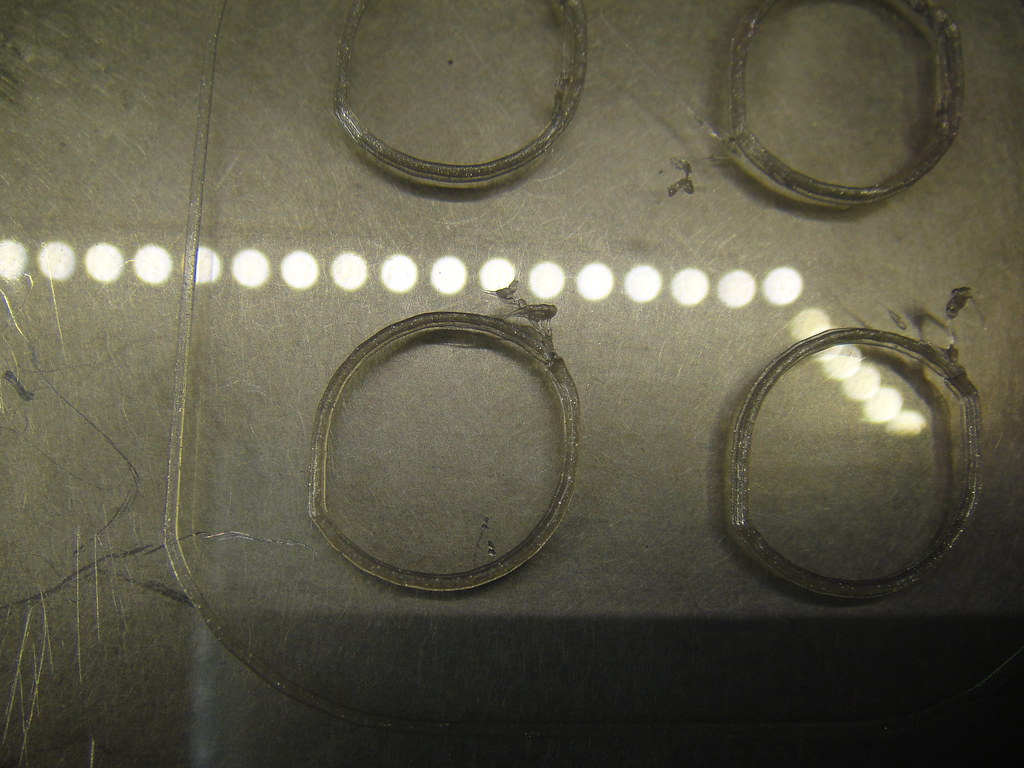
About the same time, I also started printing with new colors which I had bought in 1lbs rolls, unspooled. Printing with these new colors, I noticed that sometimes my layers were not lining up vertically.


A particularly bad example.

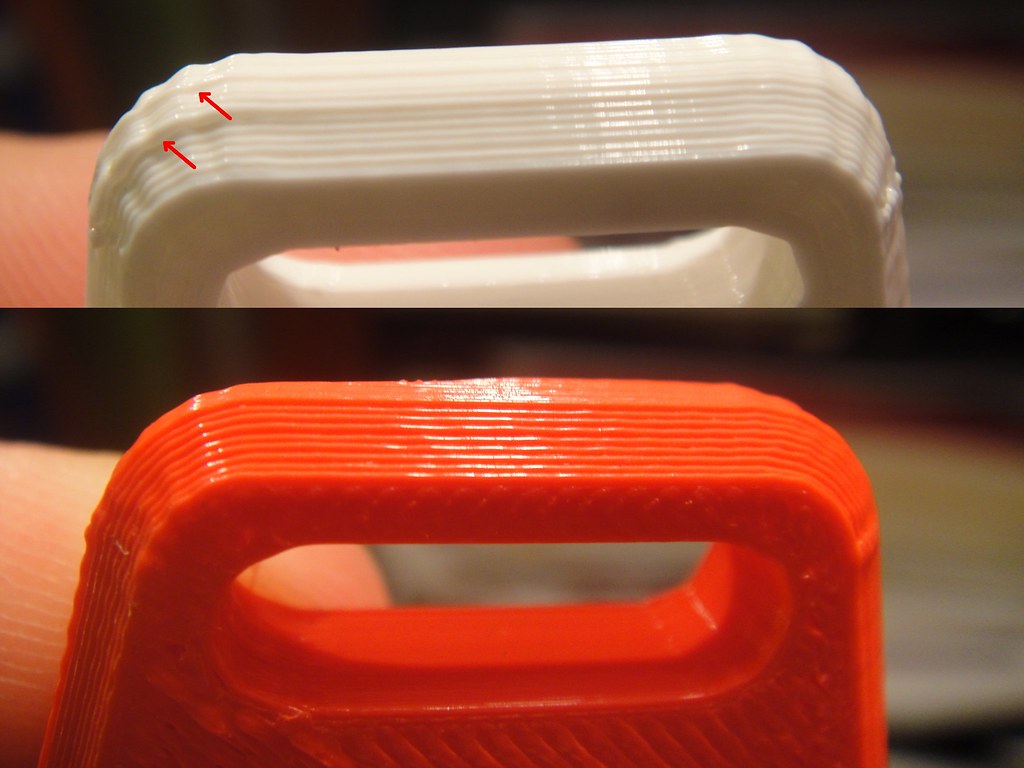
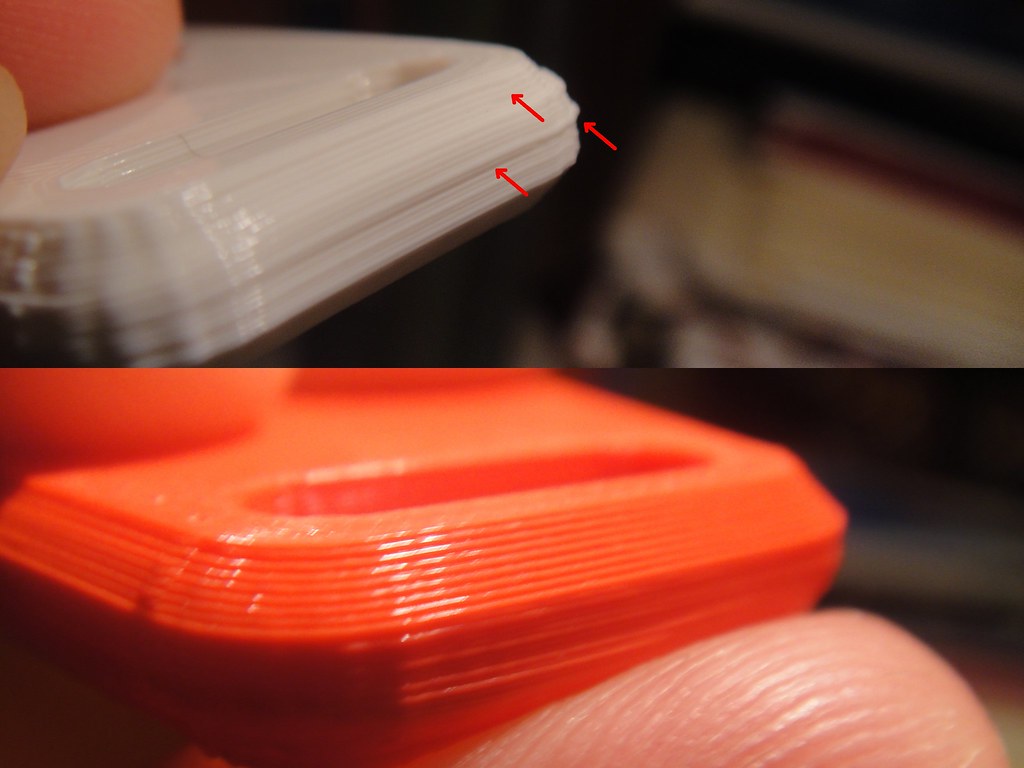
Upon closer inspection, it turns out that my x carriage bushings have a bit of play which allows the extruder to rock very slightly. This rocking is multiplied by the length of the nozzle and hot end.

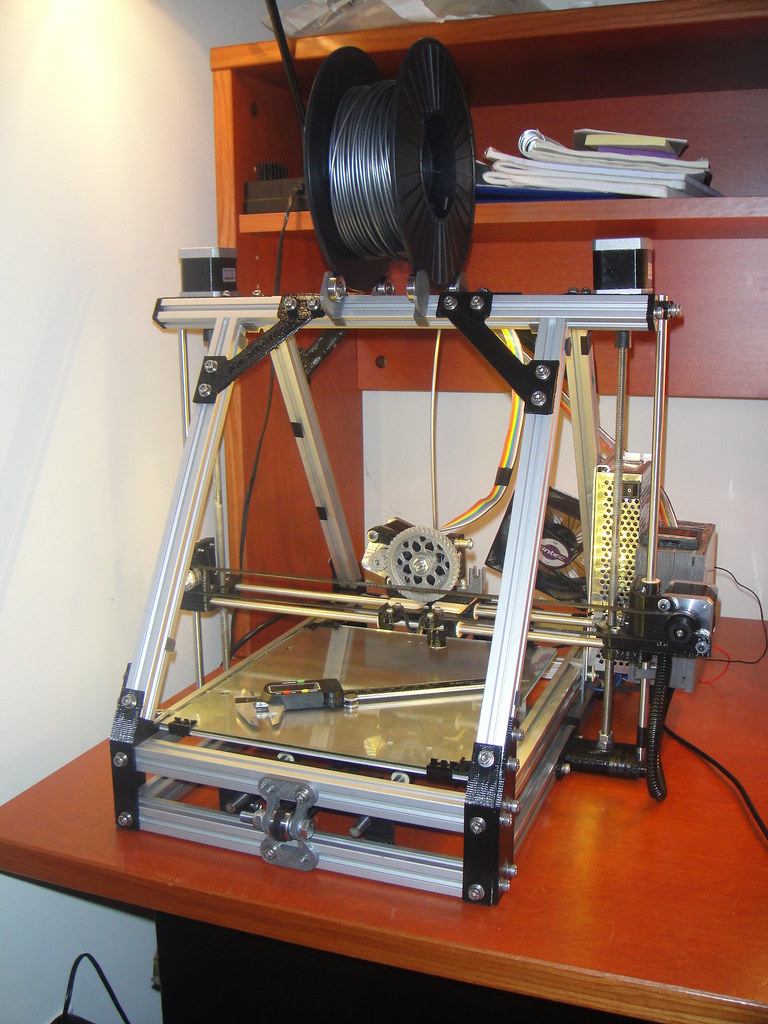
I finally set out to do what I had been planning for some time: create a spool mount that allows the spool to unravel in the x direction instead of the y direction as most mendel/prusa/mendelmax style spool holders do. For those of you using a wades/gregs style extruder, you may know, it is very stable against forces in the x direction because its 'feet' spread out in that direction. However, there really isn't anything stopping it from rocking in the y direction. Thus, I wanted to remove as much force in that direction as possible. So I whipped up a crude spool holder and filament guide to test my theory. 


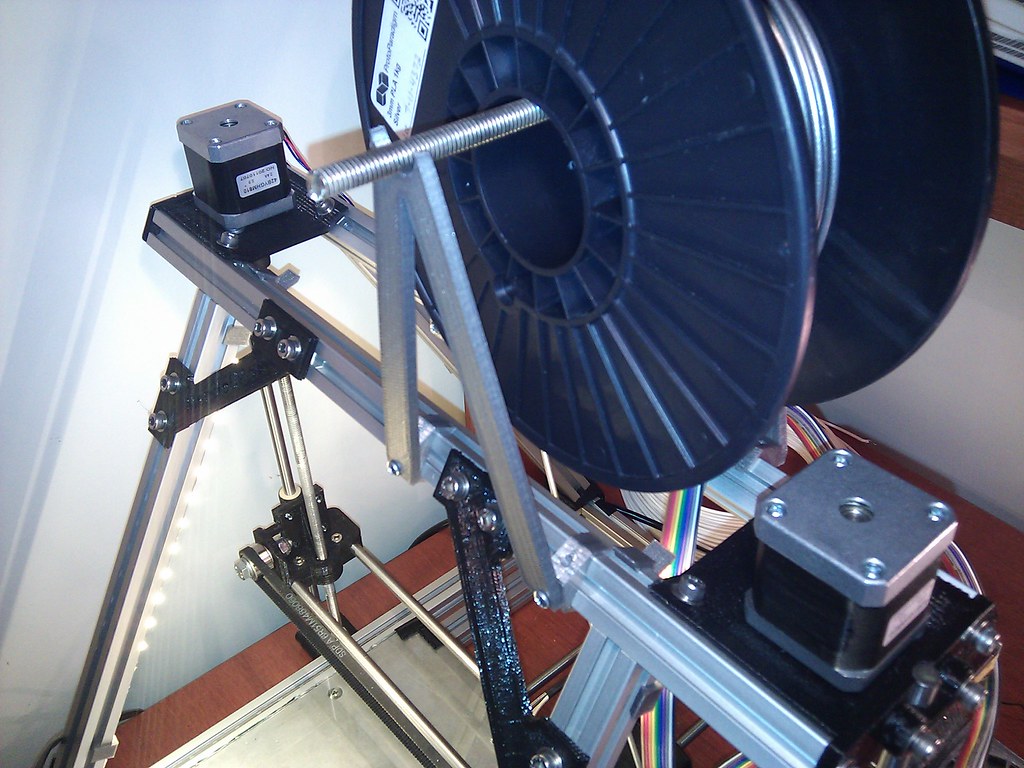
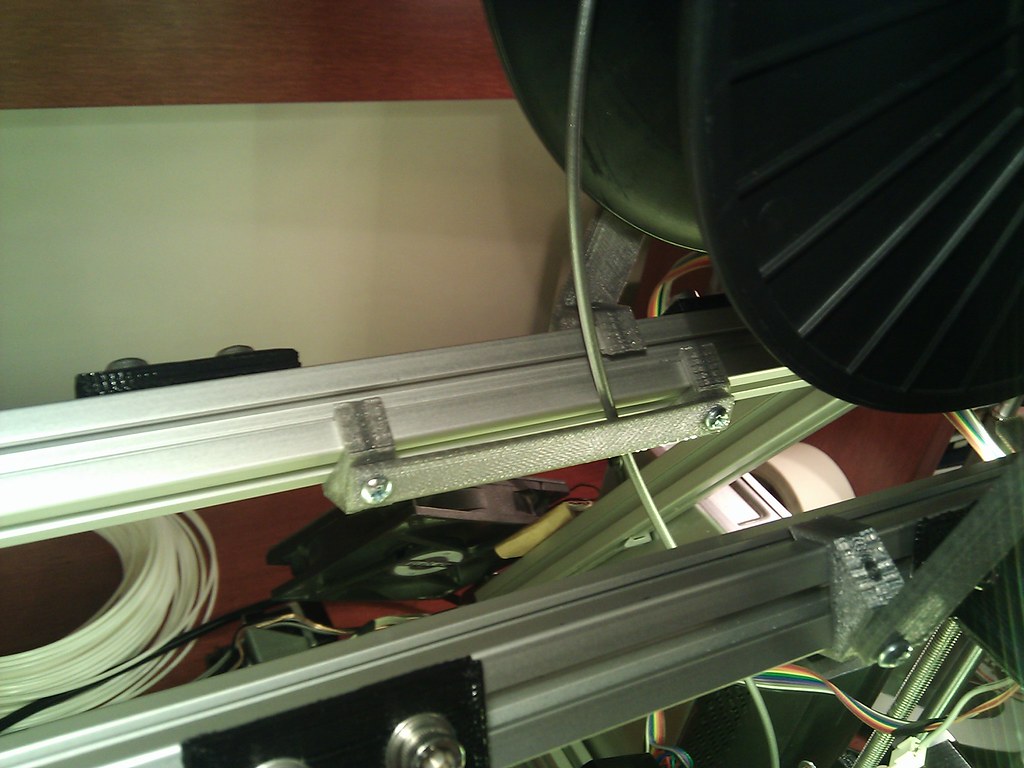
The guide allows the filament to move along the x direction with the extruder, but keeps the filament entering the extruder from the same angle all the time. I have only printed a couple of things with the new setup, but so far this has worked very well. My layers are lining up better than ever. From now on, all of my filament coils will be on spools. And, of course, I'd already planned to upgrade my x carriage and bushings to eliminate the play there.

Check out the before and after pictures below.


Thursday, March 8, 2012

Twisted Bottle


Alright, fine. It wasn't really a challenge so much as it was a friendly request. Ross over at http://blog.tinyenormous.com, whom I recently met at a local meetup posted:

"right now I'm failing at printing the twisted bottle. I got a sample from stratasys and I'm looking to see how close I can get. I can crush it on layer height, but it's super blobby right now. Team Mendemax: want to show me how it's done ; ) ?"

Sounds good to me. I hadn't tried to print the twisted bottle yet, although I had seen it on thingiverse. This one was printed at 0.2mm layer height and 0.5mm extrusion width. Observant readers will note that I'm still missing an occasional y step. The other day we talked at length about the problem in #MendelMax irc. My y assembly is too heavy and the inertia causes the y motor to miss steps during quick direction changes. I'll drop my jerk settings down to prevent the misses but ultimately there are two main problems: My y assembly needs to be lighter. And, I bought the wrong motors (2.4A). Below, find a couple of photos of the print.


Also, speaking of Ross, he recently discovered what makes my MendelMax so quiet. Hint: Apparently the feet make a difference.


Circular Things: Not So Circular

Recently, I found that circular things were not printing circularly. I also noticed that my infill was not connected to the perimeter in some cases and that my solid infill wasn't so solid. At first, I thought these things were not related. And to be honest, I thought the infill problems were a bug in slic3r because they were intermittent and happened only on certain models.


Tiny Toy Truck: The wheels are out of round and the solid fill isn't solid.


Notice the infill near the zig-zag perimeter. It doesn't connect.
I wasn't sure when this had started. I could remember printing circular things before and having them come out nicely. The first thing I did was to quickly start adjusting things. I played with my y rod mount figuring that since it was printing oval shaped things, my y axis must not be perpendicular to my x axis. I quickly found out that this wasn't going anywhere.

After a brief time of frustration, I decided I needed to be more analytical about it and create a model just for testing this problem. The model was simply a disc or coin shaped object that was 3 layers tall. I printed this with zero infill so I could just see how the perimeter turns out.

Note the two points in each circle. Also you can see from the blobbing that my extruder had some backlash which i talked about in my previous post.

The first thing I noticed after printing is that the circles weren't just out of round. They in fact each had a point in two distinct locations. So instantly I knew it wasn't a calibration issue. If I had a calibration issue, like inaccurate x/y steps or x/y axis not perpendicular to each other, the print would've still come out smooth. It would have just been out of round. This was starting to look like something was loose somewhere. I printed it a few more times and watched as it printed. It seemed that at each of the points is where the x axis was changing directions. I started hunting around the x axis looking for loose parts. I finally found that my x pulley's set screw wasn't holding the pulley to the motor shaft well enough. Such a simple problem can cause a lot of havoc in your prints. I tightened up the set screw and recalibrated my x/y steps. Voila! Perfect circles and solid infill. Nice.

That Weird 3d Sound

Aside from the music 3d printers can make, mine was making a very strange sound which, up until this point, I couldn't nail down. It sounded like cutting glass using a scorer. I asked around on the IRC channels, but nobody had heard this sound from their printers before. The sound was coming from the extruder, so I thought the hobbed bolt was shearing off filament or slipping in some way. Looking down into the extruder, I couldn't see any filament shavings. Same thing when I occasionally took the extruder apart to clear jams (point a fan at your hotend to prevent jams!), no filament shavings. So for a long time, I ignored the sound thinking that if it was shearing or slipping it couldn't be that significant or there would be plastic everywhere.

Although I had assumed it was the hobbed bolt / filament, this past weekend someone suggested to me that it could be the gears making the sound. I'm not sure why this hadn't occurred to me. Looking at the gears, I did notice a small bit of plastic shards underneath. Using pronterface (because it keeps the e motor locked), I advanced the extruder a few mm at a time and then wiggled the large gear to see if there was any backlash. I repeated this procedure until I'd completed a full revolution of the large gear.


I did a similar test after first installing the herringbone gears and found that only one spot during the rotation had some backlash. At the time I chalked this up to the gears being printed poorly. After all, I had printed them as my 3rd or 4th print. They were still much better than the regular gears I'd started with, so I ran with them. Now, I was finding there was backlash around almost the complete revolution. Tightening up my e motor eliminated the backlash. It seems that the herringbone gears were just breaking themselves in. The teeth mesh very well now. There is no backlash that I can detect. In fact, I was able to reduce my retraction down to 0.6mm from 1.2mm. This are printing much more cleanly as a result.


This is my hollow pyramid print. I haven't cleaned it up at all.

First Post: New Blog and 3D Printing

I've been wanting to create a blog for a long time now. I have lots of things floating around in my head that I'd like to share. I love to build things and so this will mostly be a tech blog about my experiences.

My latest obsession has been 3d printing. A few weeks ago, I finished building a MendelMax. Since most people that might read this blog will be RepRapers, I'll spare you the explanation. You can read about it or drop by the #mendelmax & #reprap irc channels to find out more. Building the MM has been a lot of fun, and I've learned a lot about 3D printing. The IRC channels have been especially helpful in getting advice for any problems I've run into. Everyone there is very friendly and always willing to help. If you live in the Boston area, you may have seen me give a brief presentation on 3d printing at the Boston Museum of Science recently.